
Forums › Library › Swim Course Instructions › Rhythmic Breathing
Please type your comments directly in the reply box - DO NOT copy/paste text from somewhere else into the reply boxes - this will also copy the code behind your copied text and publish that with your reply, making it impossible to read. Our apology for the inconvenience, but we don't see a convenient way of fixing this yet.
Tagged: air management, breathing, breathing timing, drills, freestyle fundamentals, rhythmic breathing
-
AuthorPosts
-
November 28, 2018 at 10:22 #20444
Admin Mediterra
KeymasterIn order to work on Rhythmic Breathing skills, we have first worked on establishing the Four Essential Features of the freestyle stroke:
- The Torpedo Frame
- Long, firm Skate Position
- ‘Send Force Forward’ through the Recovery Arm Swing
- Optimal Arm-Switch Timing
These four features create the foundation upon which you may perform easier breathing.
Previously you learned how to pause the stroke and roll onto your back to breathe in the Interrupted Breathing position. In Rhythmic Breathing, you turn only half-way, where the here the breath is integrated into the stroke rhythm rather than pausing or disrupting the stroke.
Though absolutely necessary to swim more than a few seconds, breathing is an advanced skill because it is a dependent skill. It is dependent on the foundation features of the Torpedo Frame, the Skate Position, and the ideal Arm Switch Timing. When these features are in place learning to breath rhythmically is much easier. When these are absent breathing will challenging to learn.
Rhythmic Breathing
There are a lot of little details to making breathing rhythmic and easy. These form a long list of focal points to study and work on. To make it more manageable we’ve arranged them into 3 categories and you work on them in this order of priority, so the skills come together more easily.
Skills For Rhythmic Breathing
- Positioning of Head and Lead Arm
- Timing of Turn
- Air Management (exhale/inhale)
Positioning
The two main features of Positioning are the head position and the lead arm position.
Head Position
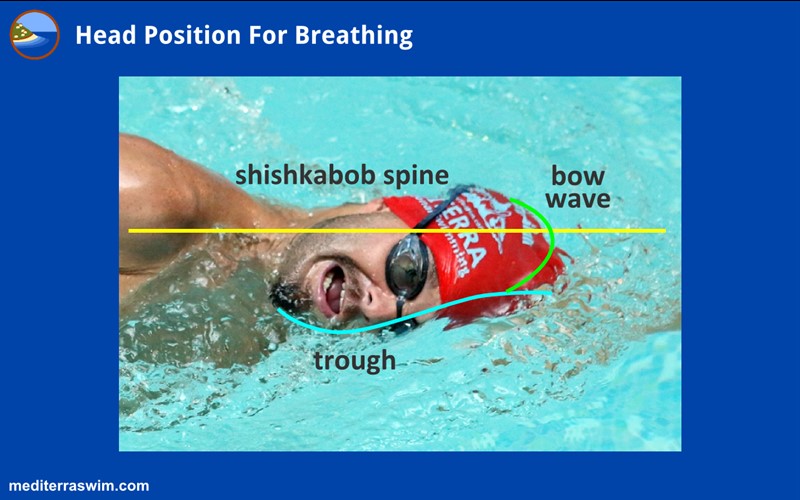
Head position is absolutely critical – the more you trust and lay that head down flat, the easier it is to get the mouth to air. This is counter-intuitive to the land-mammal brain, which urges you to tilt the head up above the surface of the water. But you don’t need the head to be out of the water to breathe – actually you just need the side of the mouth to reach up into the air.
The more of the head you can down in the water, the less you provoke gravity, the less drag created from the act of breathing. And more, by keeping the head down in the water (as seen in the image above) the head pushing through the water creates a bow wave which then creates a trough, or dip in the water right where the mouth is so that you can actually keep the mouth even lower. This is called ‘sneaky breathing’.
However, this is an all-or-nothing situation – if you tilt your head even just a little bit, that removes the bow wave and the trough and then you have to lift the head even higher out of the water to get the mouth clear. In our lessons we work on getting you into that sneaky breathing position. If it is too difficult at first to get into this position, then we’ll help you keep the head low in the water and turn the face farther up, toward the air, rather than tilt the head up.
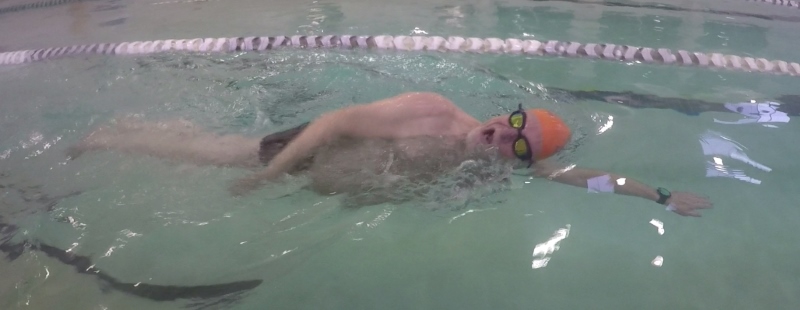
Characteristics Of Best Head Position
- Head is in line with the spine (no tilt)
- Side of head is laying on the ‘water pillow’
- Half the face is underwater while turned
- The chin and mouth are reaching farther sideways, above the surface
Lead Arm Position
And, while turning to breathe and returning the head to face-down position, the body remains extending in Skate Position. In particular, you must keep that lead arm extending forward. Again, the land-mammal instinct is to push down on the water with that lead arm in order to push the head up above the surface. The drills are meant to give you the opportunity to resist and override that old instinct.

Timing Of The Turn
The turning of the torso creates the window of opportunity for turning the head to that side to breathe. But that window is much wider than you need. You could turn early in that window of time, in the middle, or later. The best moment to turn is as soon as possible, and come to the surface as soon as possible, and return to face-down position as soon as possible – to take advantage of the moment of the stroke where there is the most acceleration, the most lift.
The later you turn, or the longer you stay, the more problems there will be because later in that window there is no more propulsion, the body is decelerating, the body is dropping lower in the water and the recovery arm is starting to come over the body, increasing the press of gravity on the body.
Characteristics Of Head Turn
- Begin turning right with the start of the catch
- Turn a bit more aggressively than the torso is turning (but not ‘whiplash’!)
- Touch the air with the mouth just long enough to make a quick sip
- Return the head immediately to face-down weightless position
Air Management
In freestyle there is an asymmetric pattern to breathing, which is not normal for humans. There is a long period of time in the non-breathing strokes where you are exhaling, and then a very brief moment where you inhale and refill the lungs.
You need to avoid two extremes:
- Holding the breath on the non-breathing strokes (no exhale underwater)
- Massive exhales (or emptying the lungs completely)
Rather, to stay most comfortable, aim for a partial air exchange, using only about 1/3 to 1/2 of your perceived lung volume. Always keep a portion in reserve. The goal is to take smaller but more frequent breaths, so that you could afford to skip one from time to time as interruptions in your access to air is common in pools and open water.
As breathing skill increases, it will feel easier to get to air, and it will be less disruptive to your stroke rhythm so you will feel like you can afford to take breaths more often.
Three Parts Of Breathing
- Exhale underwater
- Clear The Airways
- Quick Sip Of Air
Exhale Underwater
You control the volume through the exhale underwater. When swimming is light to moderate in intensity, you aim for exhaling from the nose only, mouth closed. As intensity increases you may add exhale from the mouth as well.
On the first non-breathing stroke, you may hold the breath for a moment or give the smallest bubbles from the nose. Then as you take the second and third stroke, anticipating the upcoming breathing stroke, you may start to gradually increase the intensity of the exhale, measuring it so that you come to the right volume just as your face breaks the surface to begin inhaling.
Clear The Airway
Let’s use a little technique from our aquatic cousins.
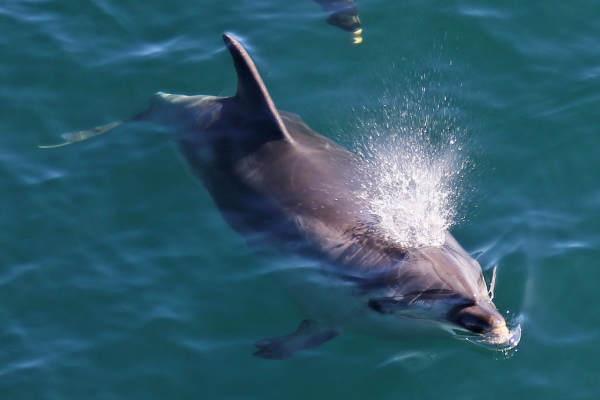
As the face is turning toward the air, right at the moment the nose and mouth are about to break the surface, you compress the diaphragm to send a blast of air out the nose and mouth to push water away from those openings.
This will help the brain feel more comfortable immediately taking an inhale. The compression of the diaphragm will prime the lungs to immediately start pulling air back in without you having to forcefully do it.
Quick Sip Of Air
The time that your face is out of the water is brief and precious. Do not waste any of that time exhaling, since you can do all of that underwater. When the mouth clears the water, everything needs to be ready to inhale immediately.
And, you are aiming to take just a quick sip of air, to top off the lungs… if you’ve carefully exhaled just a partial amount. Then turn the face back down immediately. Do not linger with the face at the surface.
Keep in mind that the farther you turn your mouth away (above) the surface of the water, the farther the head turns, the longer it will take to turn the head up and the longer it will take to get the head back to face-down weightless position. If you need to take a longer inhale, you may turn the face farther up toward the air, and be aware that you may need to pause the stroke briefly to allow for this extra time, without disrupting the stroke overlap once you resume the arm movements.
Attachments:
You must be logged in to view attached files. -
AuthorPosts
- You must be logged in to reply to this topic.