
Forums › Swim Courses › New Swimmer Lesson Series › New Swimmer Series February 2020 at MJCC
Please type your comments directly in the reply box - DO NOT copy/paste text from somewhere else into the reply boxes - this will also copy the code behind your copied text and publish that with your reply, making it impossible to read. Our apology for the inconvenience, but we don't see a convenient way of fixing this yet.
-
AuthorPosts
-
February 3, 2020 at 16:31 #29334
Jamee Small
Keymaster20/02/03 – New Swimmer Series, Lesson 1 of 4
Well done during our first session! We took it slow in this first time together to get familiar with the way we will work with the water and with attention. As we go along, you’ll be moving more and more, looking more like the technique you are eager to have.
In our first lesson we explored the initial building blocks for aquatic activities,
- Air Management,
- Buoyancy/ Gravity Relationship, and
- Balance
As we progress you will see these elements come up, again and again. During each activity we will aim to…
- Build dialogue between you and your holistic body
- Gain understanding of Air Management
- Find stability in balance and streamline frames
- Add calm, unobtrusive propulsion movements
To best incorporate your new skills with the mind and body, we use drills and cues. The Drill is the shape, activity or movement you are asked to do (i.e back float). The Cue is the visual, internal or external sensory you are asked to focus on (i.e. straight hips). At first, I will ask you to hold one cue at a time until it becomes more familiar and comfortable. Eventually it will become easier to hold and balance two cues, eventually three or more at the same time.
Below are links to the lesson outline, a practice guide and some additional articles to read if they catch your interest and you have time.
Please use this forum to stay in communication with me between and after your lessons, so I can support you as you practice.
Air Management
In freestyle there is an asymmetric pattern to breathing, which is not normal for humans. There is a long period of time in the non-breathing strokes where you are exhaling, and then a very brief moment where you inhale and refill the lungs.
You need to avoid two extremes:
- Holding the breath on the non-breathing strokes (no exhale underwater)
- Massive exhales (or emptying the lungs completely)
Rather, to stay most comfortable, aim for a partial air exchange, using only about 1/3 to 1/2 of your perceived lung volume. Always keep a portion in reserve. The goal is to take smaller but more frequent breaths, so that you could afford to skip one from time to time as interruptions in your access to air is common in pools and open water.
As breathing skill increases, it will feel easier to get to air, and it will be less disruptive to your stroke rhythm so you will feel like you can afford to take breaths more often.
To read more in depth on this topic and how it applies to the Freestyle, see Gradient Exhale for Breathing.
First, let we explored what those sensation feel like.
Learning to distinguish between building CO2 build up (through holding the breath), loss of all oxygen (full exhale), and a relationship between the two (exhale and hold, repeat) will help you better associate what you need and when.
You can do this both on dryland or in the water. However, in the water will help the nervous system associate the sensation with the environment.
Air Management Drills
*For stability, start at the wall and progress to using diving breaks to anchor footing.
- Breath Hold – Submerged, hold the breath for X seconds
- Breath Exhale – Submerged, fully exhale the breath and wait for X seconds to feel the sensation before re-emerging
- Breath Switch – Submerged, switch between exhaling, holding and exhaling to feel the inner mechanisms that control the flow of air.
- Extended Breath Hold1 – First hold the breath for X seconds, then exhale completely under water.
- Extended Breath Hold2 – Hold the breath for X seconds, exhale for X seconds, hold the breath for X seconds all in one session. Build to 10 seconds each, total of 30 seconds
- Submerged with Mouth Open (no bubbles) – Holding the breath and blocking the air passage in the back of the throat, submerge with the mouth open.
Air Management Cues
- Diaphragmatic inhale
- Steady slow exhale
- Eyes opened, eyes closed
- Relax the head and neck
Water Control
Here’s something we didn’t discuss in our session, but feel free to explore it on your own if you’re curious.
Getting water in the mouth is a normal occurrence during Integrated Breathing. Knowing that you can still breath and how to expel it will help you continue swimming without it being a distraction.
With a glass of water, take a small sip, holding water in your mouth. Holding the water in the mouth, practice the following breathing exercises.
Water Control Drills
- Mouth Open, breathing in and out of mouth
- Mouth Closed, breathing in and out of nose
- Lean forward and turn head on side, breathing in and out of mouth while water is pooled to the side of mouth.
- Lean forward and turn head on side, breathing in and out of nose while water is pooled to the side of mouth.
- Lean forward, slurp air in through the water without inhaling the water
Water Control Cues
- Quick inhale
- Slow steady exhale
- Feel the water touch the tongue and cheek
- Feel how the water in your mouth moves with you head
Balance
Balance refers to keeping the body parallel to the surface, in the ‘neutral corridor’, or the ‘neutral zone’ between gravity pushing down and water pressure pushing up. This is the corridor where you can swim along without having to waste energy fighting against those two natural forces. To read further on balance and how it effects movement in the water, you may read The Torpedo Frame. We’ll explore this frame when we come together again next week.
Even as you explore other shapes on the water, your body will seek to find this neutral space. You can play with it, try not to resist as the body bobs around finding balance.
To explore you comfort, balance and build proprioception, we did a couple fun Balance Basics activities.
Balance Drills
- Toe Touch Video
- Balance Ball Video
- Balance Ball with Arm Propulsions
- Dead Man’s Float
*Make sure to notify the Lifeguard before attempting the Dead Man’s Float exercise, so they don’t mistake it for an emergency.
Balance Cues
- Feel water lifting and supporting
- Hold shape when body wobbles and bobs
- Relax head and neck
- Repeat with Exhale
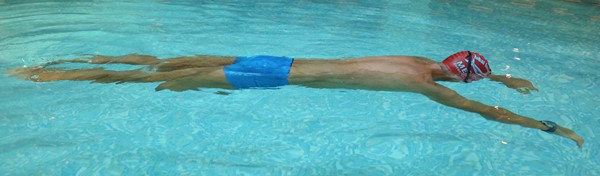
During our Air Management Drills, we began to explore the Balance Position, ‘Superman’ with support. If you feel comfortable, feel free to explore this position without support in the shallow portion of the pool.
Superman Drills
Superman Cues
- Weightless Head (Relaxed neck and shoulders, eyes looking straight down)
- Straight Spine (lifted pelvis, straight hips and knees, face parallel to ground)
Back Balance Position
Using a pool noodle can help you stay a float while focusing on both shape and relaxation while fully supported. Below is a progression of working with and slowly off the noodle to solo float.
- Noodle under lower back
- No noodle, hand on lane line/ladder/wall
- No support structure
*If you have the option, use a thin pool noddles over thick pool noodles.
Back Balance Drill
Back Balance Cues
- Relax the head and neck (as if laying it on a pillow)
- Long, straight spine
- Press the chest and shoulders down slightly to lift pelvis (avoid arching up or curving in)
- Pelvis up (press hips towards the ceiling)
- Hips straight
- Legs straight and narrow behind the body
- Take calming, Diaphragmatic Breath (inhale through mouth, exhale through nose)
February 10, 2020 at 20:50 #29343Keymaster2020/02/10 – New Swimmer, Lesson 2 of 4
We find it useful to point out and aim to develop four essential features in the freestyle stroke.
When these four features are in place, you are in position to experience the ‘magic’ of a smooth, perpetual-motion-like stroke. If one of these features are missing, or far less developed than the other features, then you may not be able to tap into that satisfying stroke motion.
Here are the four features:
- The firm Torpedo Frame
- Straight, stretched, streamline Skate Position
- ‘Send Force Forward’ through the Recovery Arm Swing
- Optimal Arm-Switch Timing
With these four in place, you may more easily insert, smooth, rhythmic breathing.
Over the course of our New Swimmer lesson series we work through each of these, making sure you have the basics of these essential features in place.
You may read more about each of these in the following introductions:
Torpedo Frame and Streamline Skate Lesson
Torpedo Balance Drills
- Standing rehearsal of Torpedo
- Torpedo
- Standing rehearsal of Superman
- Weightless Head in Deadman Float
- Superman Glide
- Superman Plus 4 Strokes
Streamline Drills
- Standing rehearsal for Skate
- Superman To Skate
- Skate To Skate (a.k.a. Skate, 1 Stroke, Skate)
You may view images of these standard TI drill positions on the Freestyle Drill Resources page and you may view additional videos for some of these drills on the Video Tutorial page.
Torpedo Cues
- ‘Mountain Pose’ (yoga) or ‘Stand At Attention’ (like military stance)
- Both hands tucked deep into pockets
- Long spine (as if pulled up by a string)
- Keep thighs straight behind torso
Superman Cues
- Focal points from Torpedo and…
- Weightless Head
- Arms On Wide Tracks
- Hands at Target Depth
- Keep forearms soft (like a tree branch)
Skate Position Cues
- Focal points for Superman and…
- Lead Arm stays on Wide Track
- Head Stays Anchored (it does not turn with torso)
- Back hand tucked deep into pocket (keep arm underwater)
- Low Rotation Angle (rotate just off your stomach)
- Scapula touches the air
Practice
You may view the Practice Plan for Balance and Streamline for some guidance on how to work on these skills on your own before our next session.
Some Additional Reading
Below are some links to articles in our library that may help you. And, I do hope you will take advantage of this discussion zone to ask me specific questions about what and how to practice. This space is meant to support you in your personal training time.
You may review our introduction to the Balance Streamline Propulsion Pyramid. You’ll use this BSP organization to help you set priorities in your skill learning process.
A central feature of our Total Immersion method is our use of Focal Points to create a super-learning situation for your brain. You may review our introduction to Focal Points.
As you do your personal practice between our live sessions, you may appreciate some guidance on how to organize your efforts. You may read How To Practice.
And, as you consider how much drills versus how much whole stroke you may do in your personal practice time you may view Transition From Drills To Whole Stroke.
February 25, 2020 at 17:47 #29370Keymaster20/02/24 – New Swimmer, Lesson 3 of 4
In this third lesson we continued working our way through the Four Essential Features, in the freestyle stroke.
We focused on the next feature:
- Send Force Forward through the Recovery Swing
Recovery Arm Lesson
You may view the outline for our second lesson on Recovery Swing, which list the skills, the drills and the focal points we used in our lesson together.
Recovery Arm Practice
You may view the Practice Plan for Recovery Swing for some guidance on how to work on these skills on your own before our next session.
Additional Notes
Dryland During our last session I mentioned practicing outside of the pool with Dryland Exercises. Linked is a video of Coach Mat demonstrating the full stroke cycle. You can isolate any portion of this exercise into Drills and Focal Points.
You will find additional Dryland demonstrations and explanations under the Video Tutorials section of the dojo.
Enjoy!
February 25, 2020 at 17:58 #29371KeymasterTo Be Scheduled – New Swimmer, Lesson 4 of 4
You may read the introduction for the Optimal Arm Switch Timing
Lesson Notes
You may view the outline on the Entry and Optimal Arm Switch Timing, which list the skills, the drills and the focal points we used in our lesson together.
Finally, combine these pieces into the Interrupted Breathing Position we discussed during Lesson 1. When you are more comfortable with this action, you can incorporate it into you which may be very helpful in your pool practice time and prepare you for Integrated Breathing in the following lessons.
Practice Notes
You may view the Practice Plan for the Entry and Optimal Arm Switch Timing for some guidance on how to work on these skills on your own.
Additional Reading
Further reading on Breathing, include Breathing Patterns (What breathing pattern should I use?).
-
AuthorPosts
- You must be logged in to reply to this topic.